how to choose the right concealer shade: Your Ultimate Guide
how to choose the right concealer shade

how to choose the right concealer shade: Your Ultimate Guide

Master the art of selecting the perfect concealer for a seamless, natural-looking complexion every time.

Find Your Perfect Match

Key Takeaways

  • ✓ Concealer shade matching depends on its intended use (undereye vs. blemishes).
  • ✓ Understanding your skin's undertone (cool, warm, neutral) is crucial for accurate matching.
  • ✓ Test concealer shades on the jawline or inner wrist for true color representation, not the back of the hand.
  • ✓ Different lighting conditions can drastically alter how a concealer appears on your skin.

How It Works

1
Identify Your Goal

Determine if you need concealer for undereye circles, blemishes, hyperpigmentation, or general brightening. This dictates the ideal shade and undertone you'll seek.

2
Understand Your Undertone

Check the color of your veins (blue/purple for cool, green for warm, mix for neutral) or how jewelry looks on you. This knowledge is paramount for harmonious blending.

3
Swatching & Testing

Apply small swatches of 2-3 potential shades directly onto the area you intend to conceal. Observe them in natural light to see which one disappears most seamlessly into your skin.

4
Final Selection

Choose the shade that either perfectly matches your skin tone (for blemishes) or is one shade lighter with a peachy/yellow undertone (for undereyes). Ensure it blends without a visible line.

Understanding Your Skin Tone and Undertone for Concealer Matching

Woman uses a makeup brush to apply cosmetics in front of a vivid red background. 
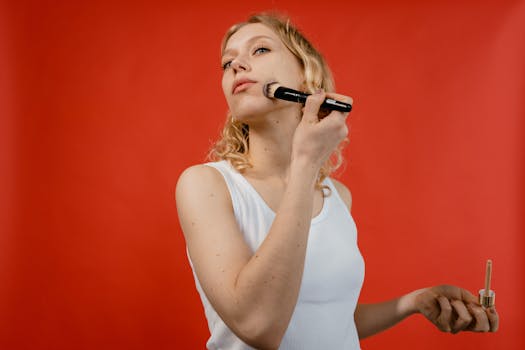
Photo: MART PRODUCTION / Pexels
The quest for the perfect concealer begins not with the product itself, but with a deep understanding of your own skin. Too often, people grab a shade that looks right in the bottle, only to find it creates an ashy, orange, or stark white cast on their face. This common pitfall arises from a lack of knowledge about skin tone and, more importantly, skin undertone. Your skin tone refers to the surface color of your skin – fair, light, medium, tan, dark, or deep. This is what you see at first glance. However, your undertone is the subtle hue beneath the surface of your skin, which affects the overall warmth or coolness of your complexion. Getting this right is absolutely critical for a seamless concealer application. There are three primary undertones: cool, warm, and neutral. Cool undertones typically have hints of pink, red, or blue. If you have cool undertones, your skin might burn easily in the sun, and silver jewelry tends to flatter you more than gold. Your veins, when viewed on your inner wrist, might appear blue or purple. Warm undertones, on the other hand, have hints of yellow, peach, or golden hues. People with warm undertones often tan easily, and gold jewelry tends to look stunning on them. Their veins might appear greener. Finally, neutral undertones are a balance of both cool and warm, meaning you might have a mix of pink and yellow, and both silver and gold jewelry look good on you. Your veins might appear a mix of blue and green. To identify your undertone, try the vein test: look at the veins on your inner wrist under natural light. If they appear blue or purple, you likely have cool undertones. If they look green, you're probably warm. If you can't tell, or they appear a mix of blue and green, you're likely neutral. Another method is the jewelry test: do you look better in silver or gold? Silver often complements cool undertones, while gold enhances warm ones. If both look equally good, you might be neutral. The sun test also offers clues: if your skin tends to burn easily, you might be cool; if you tan easily, you're likely warm. Once you've identified your undertone, you can start looking for concealers that align with it. For cool undertones, seek out concealers with pink or blue bases. For warm undertones, look for yellow or peach bases. Neutral undertones have the most flexibility and can often use concealers with balanced beige or olive tones. Understanding these foundational principles of your unique complexion is the first and most vital step in learning how to choose the right concealer shade, ensuring that your makeup enhances, rather than detracts from, your natural beauty. This knowledge empowers you to make informed decisions, moving beyond guesswork to achieve truly flawless results.

Shade Selection for Specific Concerns: Undereyes vs. Blemishes

Portrait of a man applying makeup to his eyelid, showcasing a beauty routine. 
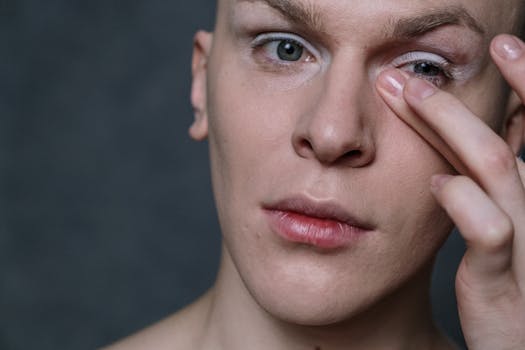
Photo: cottonbro studio / Pexels
Not all concealers are created equal, and more importantly, not all concealing needs are the same. The shade and undertone you choose will vary significantly depending on whether you're trying to camouflage dark undereye circles or cover up a pesky blemish or area of hyperpigmentation. This distinction is paramount for achieving a natural, unnoticeable finish. Using the wrong type of shade for a specific concern can actually draw more attention to the area you're trying to conceal, defeating the purpose entirely. When it comes to concealing blemishes, redness, or hyperpigmentation on the rest of your face, the goal is pure camouflage. You want the concealer to disappear seamlessly into your skin, effectively making the imperfection invisible. For this purpose, the ideal concealer shade should precisely match your skin tone. It should be neither lighter nor darker than your foundation or natural skin color. Furthermore, the undertone of your blemish concealer should also match your skin's undertone. If you have warm undertones, a concealer with a yellow or golden base will blend best. If you're cool-toned, a pink-based concealer will be more appropriate. For redness, a green color corrector applied *under* your skin-toned concealer can be a game-changer, as green neutralizes red. For dark spots, an orange or peach color corrector can counteract blue/purple tones, again, followed by a skin-toned concealer. The key here is blending; the concealer should be undetectable, becoming one with your skin. Concealing dark undereye circles, however, requires a slightly different strategy. The primary goal here is to brighten and neutralize the bluish, purplish, or greenish tones that often characterize undereye shadows. For this, a concealer that is one to two shades lighter than your skin tone is generally recommended. But it's not just about lightness; the undertone is even more critical. To counteract blue/purple undereye circles, you'll want a concealer with a peach or salmon undertone. These warm hues are opposite to blue/purple on the color wheel, making them highly effective at neutralizing darkness and brightening the area. If your undereyes lean more green/brown, a concealer with a more yellow or golden undertone will work best. Avoid concealers that are too light and cool-toned (pink-based) for undereyes, as they can make the area look ashy or gray, drawing more attention to the darkness rather than concealing it. The texture also matters here; a hydrating, non-creasing formula is essential for the delicate undereye area. By understanding these distinct approaches for different facial concerns, you can significantly elevate your concealing game and achieve truly flawless results, highlighting the importance of tailored shade selection beyond just skin tone. This nuanced approach is vital for mastering how to choose the right concealer shade for every situation.

Testing Techniques and Avoiding Common Concealer Mistakes

Crop African American female visagiste with cosmetic product doing makeup to smiling model in studio 
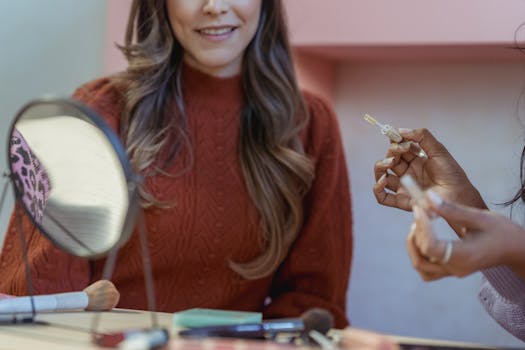
Photo: George Milton / Pexels
Even with a solid understanding of your skin tone, undertone, and the specific concerns you're addressing, the actual process of testing and selecting a concealer can still be fraught with potential missteps. Many people make crucial errors during the testing phase that lead to purchasing the wrong shade, resulting in a product that sits unused in their makeup bag. Mastering the correct testing techniques is as important as understanding the theory behind shade selection, ensuring you walk away with a concealer that genuinely enhances your complexion. One of the most common mistakes is testing concealer on the back of your hand or wrist. While these areas can give you a general idea of color, they rarely match the skin tone and undertone of your face, especially the delicate undereye area or the specific spots you're trying to conceal. The most effective way to test a concealer is to apply a small swatch directly onto the area you intend to conceal. For undereye circles, apply a small stripe under your eye. For blemishes or hyperpigmentation, dab a tiny bit directly onto the spot. If you're unsure, or testing multiple shades, apply 2-3 thin stripes side-by-side on your jawline, blending them slightly. This allows you to see how the color interacts with your actual facial skin tone and undertone. Another critical factor often overlooked is lighting. Department store lighting, with its often harsh fluorescent glow, can be incredibly misleading. A shade that looks perfect under artificial light might appear completely different in natural daylight. After swatching, step outside or stand near a window to observe the shades in natural light. This is where the true color will reveal itself, allowing you to see which shade truly disappears into your skin. Don't be afraid to take a selfie in natural light either; sometimes the camera can reveal nuances that are harder to spot in a mirror. Beyond incorrect testing locations and poor lighting, other common concealer mistakes include choosing a shade that's too light for blemishes (which can create a white halo effect), selecting a formula that's too thick or dry for the undereye area (leading to creasing and accentuating fine lines), or applying too much product. Less is often more with concealer. Start with a tiny amount and build coverage as needed. Also, remember that your skin tone can change with the seasons; you might need a slightly different shade in the summer compared to winter. Don't be afraid to re-evaluate your concealer shade periodically. Finally, ensure you're using the right tools – a clean finger, a damp beauty sponge, or a small, fluffy brush can all help blend the product seamlessly. By adopting these meticulous testing techniques and actively avoiding common pitfalls, you will significantly improve your ability to how to choose the right concealer shade, leading to a more polished and natural makeup look every single time.

Expert Tips for Flawless Application and Long-Lasting Wear

A makeup setup with various cosmetics and mirror reflection captured indoors. 
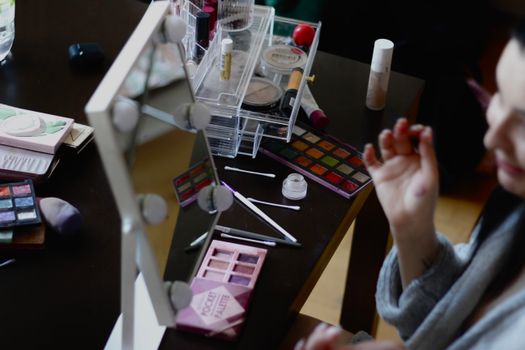
Photo: shawfott  / Pexels
Choosing the right concealer shade is only half the battle; knowing how to apply it flawlessly and ensure it lasts all day is the other, equally important part. Even the most perfectly matched concealer can look cakey, crease, or disappear if not applied correctly. These expert tips will help you maximize the potential of your chosen product and achieve a truly seamless, long-lasting finish. First and foremost, skin preparation is key. Always apply concealer to well-hydrated skin. For undereyes, a nourishing eye cream provides a smooth canvas, preventing the concealer from settling into fine lines. For blemishes, ensure your skin is clean and moisturized. Dry, flaky skin will only be accentuated by concealer. A primer can also be beneficial, especially around the eyes or on areas prone to creasing, as it creates a barrier and helps the product adhere better. Next, consider your application technique. For undereyes, many makeup artists recommend applying concealer in an inverted triangle shape, rather than just a crescent directly under the eye. This technique brightens the entire central part of the face and lifts the appearance of the eye area. Use a damp beauty sponge or your ring finger (the warmth helps melt the product into the skin) to gently pat and blend the concealer, rather than rubbing. Patting builds coverage and prevents streaking. For blemishes, use a small, precise brush to dab the concealer directly onto the imperfection, then lightly feather out the edges with your finger or sponge to blend it into your surrounding skin. Avoid wiping or dragging, which can remove the product. Setting your concealer is crucial for longevity, especially for oily skin types or in humid climates. A translucent setting powder, applied sparingly with a fluffy brush or a damp sponge (for 'baking'), can lock your concealer in place. For undereyes, choose a finely milled, brightening powder that won't look heavy or cakey. Lightly dust it over the concealed area. Be careful not to over-powder, as this can lead to a dry, crepey appearance. For blemishes, a light pat of powder will suffice. Finally, a setting spray can further extend wear, melting all your makeup layers together for a more natural finish. * **Tip 1: Layering for Coverage:** If your dark circles or blemishes are particularly stubborn, consider layering. Start with a thin layer of color corrector (peach for undereyes, green for redness), then apply your skin-toned concealer on top. Finish with a light dusting of setting powder. * **Tip 2: Less is More:** Always start with a small amount of product. You can always add more if needed, but it's much harder to fix over-application without disrupting your base. * **Tip 3: Blending is Your Best Friend:** Ensure there are no harsh lines where your concealer ends and your foundation or natural skin begins. Seamless blending is the secret to an undetectable finish. * **Tip 4: Choose the Right Formula:** Beyond shade, consider the formula. Liquid concealers are versatile, cream concealers offer more coverage, and stick concealers are great for targeted application. Choose based on your skin type and desired finish. * **Tip 5: Seasonal Adjustments:** Your skin tone may lighten or darken throughout the year. Don't be surprised if you need a slightly different concealer shade for summer versus winter. Periodically re-evaluate your match to ensure continuous perfection.

Comparison

FeatureUndereye ConcealerBlemish ConcealerColor Corrector
Primary GoalBrighten & neutralize darknessCamouflage imperfectionsNeutralize specific tones
Ideal Shade1-2 shades lighter than skinExact match to skin toneOpposite tone on color wheel
Key UndertonePeach, salmon, yellowMatches skin's undertoneGreen (for red), Orange (for blue)
Texture PreferenceHydrating, creamy, non-creasingMedium-full coverage, matte/satinThin, blendable, usually creamy
Application SpotUnder eye area, inner cornerBlemishes, dark spots, rednessDirectly on discolored area (under concealer)

What Readers Say

"This guide completely changed how I approach concealer! I used to just pick the lightest shade, but understanding undertones and testing on my jawline made all the difference. My undereyes look so much brighter now."

Sarah J. · Austin, TX

"As a guy, I never thought much about makeup, but I wanted to cover some redness. The advice on matching my skin tone exactly for blemishes was spot on. It looks completely natural, no one even notices."

Michael R. · Chicago, IL

"I always struggled with my concealer creasing. This article's tips on hydrating and setting powder were a game-changer. Now my concealer stays put all day, even in the humidity!"

Jessica L. · Miami, FL

"The information on undereye vs. blemish shades was really helpful. I still find it a bit tricky to perfectly identify my undertone, but the vein test gave me a good starting point and improved my choices."

David P. · Denver, CO

"I loved the tip about testing concealer in natural light. I used to buy shades that looked great in the store but awful at home. Now I step outside every time, and it's made all the difference in finding my perfect match."

Emily K. · Seattle, WA

Frequently Asked Questions

What's the biggest mistake people make when choosing concealer?

The most significant mistake is not understanding their skin's undertone and testing concealer in poor lighting or on the wrong part of their body. Many also use a single shade for all concerns, when undereyes and blemishes often require different approaches to shade and undertone for optimal results.

My concealer always looks cakey. What am I doing wrong?

Cakey concealer is often due to over-application, using a formula too thick or dry for your skin type, or applying it to unmoisturized skin. Ensure your skin is hydrated, use a small amount of product, and blend thoroughly with a damp sponge or finger. Setting with a very light hand can also help.

How do I know if I have cool, warm, or neutral undertones?

Check the veins on your inner wrist: blue/purple veins suggest cool undertones, green veins suggest warm, and a mix indicates neutral. Another test is whether silver (cool) or gold (warm) jewelry flatters you more. If both do, you might be neutral.

Is it worth buying an expensive concealer, or are drugstore options just as good?

Both high-end and drugstore brands offer excellent concealers. The 'worth' depends on your specific needs, skin type, and budget. Some expensive options offer unique formulations or a wider shade range, but many affordable concealers perform exceptionally well. Focus on finding the right shade and formula for you, regardless of price point.

Should my concealer match my foundation exactly?

Not necessarily. For blemishes and hyperpigmentation on the face, your concealer should closely match your foundation or natural skin tone. However, for undereye circles, a concealer one to two shades lighter than your foundation, with a color-correcting undertone (like peach or yellow), is often preferred to brighten the area.

Who should use color correctors before concealer?

Anyone looking to neutralize specific discoloration before applying their skin-toned concealer. Green correctors are for redness (acne, rosacea), peach/orange correctors are for blue/purple dark circles or dark spots, and yellow correctors can brighten dullness. They are an extra step but can dramatically improve the final look.

Can I use the same concealer for both undereyes and blemishes?

While technically possible, it's generally not recommended for optimal results. Undereyes benefit from lighter, more hydrating formulas with peach/yellow undertones, while blemishes need an exact skin-tone match with good coverage and often a slightly thicker consistency. Using a dedicated product for each concern yields better, more natural-looking results.

What's the future trend for concealer shade matching?

The future of concealer matching is moving towards hyper-personalization, with more brands offering extensive shade ranges that cater to a wider spectrum of undertones and depths. AI-powered apps and in-store devices that scan your skin for precise shade recommendations are also becoming more prevalent, taking much of the guesswork out of the selection process for consumers.

Mastering how to choose the right concealer shade is a foundational skill for any beauty routine. By understanding your unique skin tone and undertone, and applying these expert techniques, you can confidently select the perfect concealer to achieve a flawless, natural-looking complexion every single day. Start your journey to perfect skin today!

Topics: how to choose the right concealer shadeconcealer matchingundereye concealerblemish concealerskin undertones
Leo List
Brampton weed
Adultwork