✓ A smoky eye is not limited to black; it can be created with various dark shades.
✓ Blending is the most crucial step for a seamless smoky eye effect.
✓ Primer is essential for preventing creasing and enhancing color payoff.
✓ Different eye shapes may require slight adjustments to the smoky eye technique.
How It Works
1
Prime Your Lids
Prepare your eyelids with a good eye primer to create a smooth canvas and ensure your shadow lasts all day without creasing. This step enhances color vibrancy and helps with blendability.
2
Build Your Base
Apply a medium-toned eyeshadow over your entire lid, focusing on building intensity. This color will serve as the transition shade and the foundation for your darker colors.
3
Deepen and Define
Introduce your darkest shade to the outer V and lash line, blending it inwards to create depth. Gradually build up the intensity until you achieve your desired smoky effect.
4
Blend, Blend, Blend
Use a clean, fluffy brush to seamlessly blend all the colors together, ensuring there are no harsh lines. This step is critical for achieving the characteristic diffused, smoky finish.
Understanding the Anatomy of a Flawless Smoky Eye
Photo: Wojtek Pacześ / Pexels
The smoky eye is a timeless and versatile makeup look that has graced countless red carpets, fashion runways, and everyday ensembles. Far from being a one-size-fits-all approach, mastering how to create a smoky eye look involves understanding its fundamental components and how they interact to produce that captivating, smoldering gaze. At its core, a smoky eye is characterized by a gradual transition of color, typically from a darker shade at the lash line to a lighter, diffused shade towards the brow bone, often accompanied by definition on the lower lash line. This gradient effect is what gives it its 'smoky' appearance, making the eyes look larger, more intense, and incredibly alluring. It's not just about slapping on dark eyeshadow; it's an art of layering and blending that, once perfected, becomes a powerful tool in your beauty arsenal. Many beginners often associate the smoky eye exclusively with black eyeshadow, but this couldn't be further from the truth. While the classic black and charcoal smoky eye remains iconic, the technique can be applied using a spectrum of colors. Deep browns, rich plums, emerald greens, navy blues, and even metallic shades can all be used to achieve a smoky effect, allowing for endless customization to suit different outfits, occasions, and personal preferences. The key is to select shades within the same color family or complementary tones that allow for smooth blending. For instance, a brown smoky eye might involve a range of chocolate, taupe, and bronze shades, while a purple smoky eye could incorporate deep aubergine, lavender, and shimmering lilac. The choice of color significantly impacts the overall mood of the look, from sultry and dramatic to soft and ethereal. Beyond color, the texture of the eyeshadows plays a crucial role. Matte shades are excellent for building depth and defining the crease, while shimmers and metallics add dimension and a touch of glamour, often applied to the center of the lid or the inner corner. A good quality eyeshadow palette designed for smoky eyes will often include a mix of these textures to facilitate a complete look. Furthermore, understanding your eye shape is paramount when learning how to create a smoky eye look. While the basic principles remain consistent, slight adjustments in placement and blending can make a significant difference. For hooded eyes, focusing the darker shades higher into the crease and using lighter shimmers on the mobile lid can help open up the eye. For almond eyes, the classic technique often works beautifully. Round eyes can benefit from extending the smoky effect slightly outwards to elongate the eye. The beauty of the smoky eye is its adaptability, making it a universally flattering look when tailored correctly. The journey to mastering this look is one of practice and experimentation, discovering what works best for your unique features and style. Don't be afraid to try different color combinations and blending techniques. Remember, makeup is about enhancement and self-expression, and the smoky eye is a fantastic way to achieve both. For more tips on enhancing your natural features, check out our guide on understanding your face shape for makeup.
Essential Tools and Products for a Dazzling Smoky Eye
Photo: Paul Espinoza / Pexels
Achieving a professional-looking smoky eye isn't just about technique; it's also heavily reliant on having the right tools and high-quality products. Just as a painter needs a variety of brushes and pigments, a makeup artist (or aspiring one) requires a specific kit to execute this intricate look. Investing in these essentials will not only make the process of how to create a smoky eye look significantly easier but also ensure a more polished and long-lasting result. First and foremost, a good eye primer is non-negotiable. An eye primer creates a smooth, even base for your eyeshadow, preventing creasing, intensifying color payoff, and extending wear time. Without it, your carefully blended smoky eye can fade or settle into fine lines within hours. Look for primers that are specifically formulated for eyelids, as they are designed to combat oiliness and provide a tacky surface for shadows to adhere to. Next, you'll need a selection of eyeshadows. While individual pots are an option, an eyeshadow palette curated with smoky eye shades is often the most convenient choice. A typical smoky eye palette should include at least three to four shades: a light matte shade for the brow bone and inner corner, a medium transition shade, a dark matte shade for depth, and a shimmer or metallic shade for added glam. The quality of these shadows is paramount; highly pigmented and easily blendable formulas will make your life much easier. Brands known for their excellent eyeshadow quality often offer palettes specifically designed for smoky looks. When it comes to brushes, a diverse collection is key for mastering how to create a smoky eye look. You’ll need a fluffy blending brush (or two) to seamlessly diffuse colors and eliminate harsh lines. A smaller, more precise blending brush is useful for working in the crease and outer V. A flat shader brush is perfect for packing on color onto the lid, especially shimmers. Don't forget a pencil brush or a small, angled brush for precise application on the lower lash line. Cleaning your brushes regularly is also crucial for hygienic application and optimal performance. Eyeliner is another critical component. A black or dark brown kohl pencil eyeliner is ideal for creating a smoky base on the lash line, which helps to intensify the look and make lashes appear thicker. Gel liners or liquid liners can also be used for a more defined top lash line, though for a truly smoky effect, a pencil or cream liner that can be smudged is often preferred. Mascara is the finishing touch that brings the entire smoky eye together. A volumizing and lengthening mascara will make your lashes pop against the dark shadow, completing the dramatic effect. For an even more intense look, consider applying false eyelashes; they add incredible volume and allure. Lastly, don't underestimate the power of concealer. After applying your smoky eye, a good concealer under the eyes can brighten the area and clean up any fallout, ensuring a crisp, clean finish. A setting spray can also help lock everything in place, especially if you're wearing the look for an extended period. With these essential tools and products in hand, you'll be well-equipped to experiment and perfect your smoky eye technique.
Step-by-Step Guide: Mastering the Classic Smoky Eye Technique
Photo: www.kaboompics.com / Pexels
Learning how to create a smoky eye look can seem daunting at first, but by breaking it down into manageable steps, you'll find it's an achievable and incredibly rewarding skill. This guide focuses on the classic black/charcoal smoky eye, a versatile look that can be adapted with different color palettes once you've mastered the foundational technique. **Step 1: Prep Your Canvas.** Begin with a clean and moisturized face. Apply an eye primer to your entire eyelid, from the lash line up to your brow bone. This crucial step creates a smooth, uniform base, enhances shadow pigmentation, and prevents creasing, ensuring your smoky eye lasts all day or night. Let it set for a minute before moving on. **Step 2: Lay Down Your Base Color.** Using a flat shader brush, apply a medium-toned eyeshadow (a taupe, light brown, or soft grey) all over your mobile lid. This serves as a transition shade and helps the darker colors blend more seamlessly later on. Focus on packing the color onto the lid rather than blending it out too much at this stage. **Step 3: Create Depth with a Darker Shade.** Now, it's time for the star of the show. Take a dark kohl pencil eyeliner (black or dark brown) and draw a thick line along your upper lash line, extending slightly past the outer corner. Don't worry about perfection; this line will be smudged. Immediately, before the liner sets, use a small, dense brush (like a pencil brush) to smudge and blend this line upwards and outwards, creating a soft, smoky base. This technique is key to building intensity right at the lash line. **Step 4: Pack on the Dark Eyeshadow.** With the same dark eyeshadow shade (a deep charcoal, black, or dark plum) that matches your eyeliner, use a flat shader brush to press the color directly over the smudged eyeliner. This step intensifies the color and helps to set the creamy liner, preventing it from creasing. Gently tap the brush to build up the color, focusing on the lash line and the outer V of your eye. **Step 5: Blend Your Crease.** This is where the magic happens. Take a clean, fluffy blending brush and a slightly lighter matte eyeshadow (a medium grey or brown, depending on your palette). Apply this shade into your crease with gentle, circular motions, blending the darker shade upwards and outwards towards your brow bone. The goal is to diffuse the harsh edges of the dark shadow, creating a seamless transition. Remember, blend until your arm hurts – seriously, good blending is the secret to a flawless smoky eye. **Step 6: Define the Lower Lash Line.** To complete the smoky effect, apply the dark kohl eyeliner to your lower water line and along your lower lash line. Use the same small, dense brush to gently smudge and smoke out the lower lash line with the dark eyeshadow you used on your upper lid. Connect this lower lash line smudge to the outer corner of your upper lid for a cohesive look. **Step 7: Highlight and Brighten.** Apply a light, shimmery eyeshadow (a champagne, silver, or pale gold) to your inner corner and just under your brow bone. This step brightens the eyes and adds a touch of glamour, creating a beautiful contrast with the darker shades. **Step 8: Finish with Mascara and Optional Lashes.** Curl your lashes and apply several coats of volumizing black mascara to both your upper and lower lashes. For extra drama, apply a pair of false eyelashes. Ensure your brows are also groomed, as well-defined brows frame the smoky eye beautifully. For more detailed application advice, explore our article on perfecting your eyebrow routine. Remember, practice makes perfect. Don't be discouraged if your first attempt isn't flawless. Each time you try, you'll refine your technique and discover what works best for your eye shape and preferences. Experiment with different shades and intensities until you master your signature smoky eye.
Advanced Tips and Common Smoky Eye Mistakes to Avoid
Photo: www.kaboompics.com / Pexels
Once you've grasped the basics of how to create a smoky eye look, you can elevate your technique with advanced tips and sidestep common pitfalls that can detract from the overall effect. These insights will help you refine your skills and achieve a truly professional finish every time. **Advanced Tips for a Next-Level Smoky Eye:**
* **Embrace Color:** Don't limit yourself to black and grey. Experiment with jewel tones like emerald green, sapphire blue, or amethyst purple for a vibrant twist. Earthy browns and bronzes create a softer, more everyday smoky look. The principles of blending remain the same, just with a different palette.
* **Halo Smoky Eye:** For a unique take, apply a pop of shimmer or a lighter, brighter shade directly in the center of your mobile lid after the dark shades are applied. This creates a 'halo' effect, making your eyes appear more open and dimensional.
* **Cream Shadow Base:** Instead of just a pencil liner, use a cream eyeshadow in a dark shade as your initial base. This can provide an even more intense and long-lasting canvas for your powder shadows, making blending smoother.
* **Cut Crease Hybrid:** Combine the smoky eye with a subtle cut crease. After applying your dark shades, use a tiny amount of concealer on a flat brush to define the edge of your mobile lid, then set it with a light, shimmery shade. This adds precision and drama.
* **Tightlining:** For ultimate definition, tightline your upper waterline with a black or dark brown waterproof eyeliner. This makes your lash line appear fuller and more defined without visible liner.
* **Strategic Highlighting:** Beyond the inner corner and brow bone, a tiny dab of shimmer on the center of your lower lash line can add an extra sparkle and dimension to your smoky eye.
**Common Smoky Eye Mistakes to Avoid:**
* **Skipping Primer:** As mentioned, primer is essential. Without it, your carefully crafted smoky eye can crease, fade, and lose its intensity quickly.
* **Not Blending Enough:** This is arguably the biggest mistake. Harsh lines are the enemy of a smoky eye. Blend, blend, and blend some more until all colors seamlessly transition into one another. Use clean blending brushes.
* **Applying Too Much Product at Once:** It's easier to build up color intensity gradually than to try and remove excess. Start with a light hand and add more product as needed.
* **Going Too Dark Too Quickly:** Layering is key. Start with medium tones, then slowly introduce your darkest shades. This allows for better control and blending.
* **Ignoring Eye Shape:** A smoky eye isn't one-size-fits-all. Adjust your application to suit your eye shape. For instance, those with smaller lids might want to keep the darkest shades closer to the lash line and use lighter colors in the crease.
* **Unblended Lower Lash Line:** A beautifully smoked out upper lid paired with a harsh, unblended line on the bottom looks incomplete. Always smoke out the lower lash line to tie the look together.
* **Forgetting to Clean Up Fallout:** Dark eyeshadows are prone to fallout. Do your eye makeup first, then clean up any fallen particles with a cotton swab dipped in micellar water or concealer before applying foundation and concealer to the rest of your face.
* **Matching Lips Too Darkly:** A dramatic smoky eye usually pairs best with a nude or subtle lip color to avoid overpowering your face. If both eyes and lips are intensely dark, it can look heavy. However, for a high-fashion, editorial look, a dark lip can be stunning if balanced correctly. By integrating these advanced tips and consciously avoiding these common errors, your journey to mastering how to create a smoky eye look will be much smoother and more successful. Practice and experimentation are your best allies in becoming a smoky eye pro.
Comparison
Feature
Classic Smoky Eye
Soft Brown Smoky Eye
Colored Smoky Eye
Halo Smoky Eye
Intensity
High
Medium
Medium-High
High
Color Palette
Black, Charcoal, Grey
Browns, Taupes, Bronzes
Jewel Tones (e.g., Purple, Green, Blue)
Any base, bright shimmer center
Best For
Evening, Dramatic looks
Daytime, Everyday glam
Statement, Creative looks
Adding Dimension, Special occasions
Complexity
✓
✓
✓
✓
Blend Focus
High
High
High
High
What Readers Say
★★★★★
"This guide completely demystified how to create a smoky eye look for me! The step-by-step instructions were so clear and easy to follow. My first attempt actually looked presentable, which is a miracle!"
Sarah J. · Austin, TX
★★★★★
"I used to think smoky eyes were only for pros, but after reading this, I felt confident enough to try. The product recommendations were spot on, and the blending tips made all the difference. Highly recommend this article!"
Maria L. · Miami, FL
★★★★★
"Following these steps, I managed to create a stunning smoky eye for a wedding last weekend. I got so many compliments! The advice on building color gradually truly helped me achieve a smooth, professional finish."
Jessica R. · Chicago, IL
★★★★★
"The guide is fantastic, especially the section on common mistakes. I realized I was blending too little! While it still takes me a bit of time, the results are much better now. Just wish there were more visual examples."
Emily C. · Denver, CO
★★★★★
"As a makeup artist, I appreciate the depth and detail in this article. It covers all the crucial aspects of how to create a smoky eye look, even for beginners, and offers great insights into color theory and tools. Excellent resource!"
David P. · New York, NY
Frequently Asked Questions
What is the most crucial step when learning how to create a smoky eye look?
Blending is by far the most crucial step. A successful smoky eye relies on seamlessly diffused edges with no harsh lines. Take your time with blending brushes to ensure all colors transition smoothly, creating that characteristic soft, smoky effect.
I'm worried my smoky eye will look messy or like a black eye. How can I avoid this?
To avoid a messy look, start with minimal product and build intensity gradually. Also, always tap off excess shadow from your brush. Most importantly, blend diligently after each application to soften edges. Using an eye primer also helps prevent smudging and creasing.
How do I make my smoky eye last all day or night without creasing?
To ensure your smoky eye lasts, always start with an eye primer. Layering cream shadows under powder shadows can also enhance longevity. Finish with a setting spray to lock your makeup in place, especially if you have oily eyelids.
Are expensive products necessary to achieve a good smoky eye?
While high-quality, pigmented eyeshadows and good brushes certainly make the process easier, you don't need to break the bank. Many affordable brands offer excellent eyeshadow palettes and blending brushes that perform beautifully. Focus on blendability and pigment over brand name.
How does a smoky eye compare to a cut crease look?
A smoky eye is characterized by diffused, blended edges and a gradual transition of color, creating a soft, smoldering effect. A cut crease, in contrast, features a sharp, defined line that separates the crease color from the lid color, creating a more angular and precise look. While both can be dramatic, their techniques and final aesthetics are distinct.
Who should try learning how to create a smoky eye look?
Anyone interested in elevating their makeup skills and adding a versatile, impactful look to their repertoire should learn how to create a smoky eye. It's suitable for various occasions, from a subtle daytime version to a dramatic evening statement, and can be adapted for all eye shapes.
Is there a risk of eye irritation when using dark eyeshadows for a smoky eye?
To minimize irritation, always use makeup products specifically formulated for eye safety. Ensure your brushes are clean, and avoid getting excessive fallout into your eyes. If you have sensitive eyes, opt for hypoallergenic or ophthalmologist-tested products and remove your makeup thoroughly before bed.
What are the future trends for the smoky eye look?
Future trends for the smoky eye are moving towards more colorful and experimental interpretations. Expect to see more vibrant jewel tones, softer diffused edges, and innovative placements like reverse smoky eyes (focusing the smoke on the lower lash line). Graphic elements combined with smoky textures are also gaining popularity.
Ready to transform your gaze? With this comprehensive guide on how to create a smoky eye look, you have all the knowledge and tips you need to master this iconic style. Grab your brushes, experiment with confidence, and unveil the captivating allure of your perfectly blended smoky eyes today!

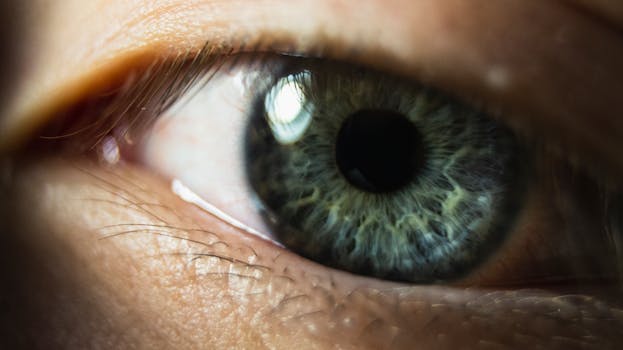 Photo: Wojtek Pacześ / Pexels
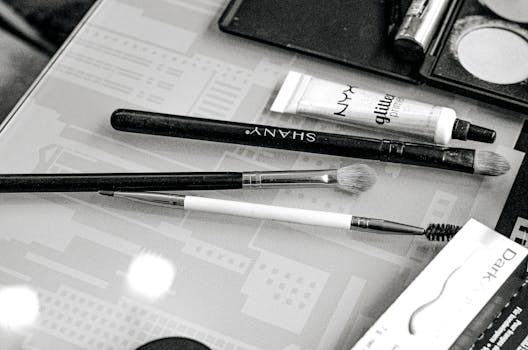 Photo: Paul Espinoza / Pexels
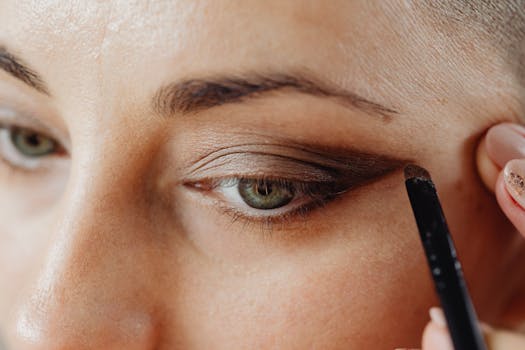 Photo: www.kaboompics.com / Pexels