How to Do a Smoky Eye for Beginners: Your Ultimate Guide
June 23, 2026 15 min read 3,095 words
Unlock the secret to a captivating smoky eye, even if you've never tried it before. Achieve a stunning look with confidence.
Start Your Transformation
Understanding the Anatomy of a Smoky Eye: Beyond the Basics
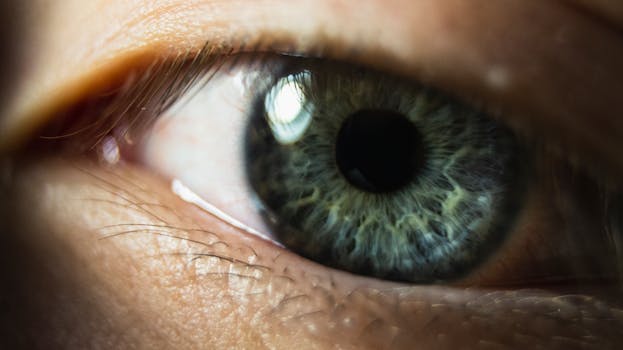 Photo: Wojtek Pacześ / Pexels
The smoky eye is an iconic makeup look, celebrated for its ability to add drama, depth, and allure to any gaze. Often intimidating for beginners, its essence lies not in complexity, but in strategic layering and meticulous blending. Before diving into the practical steps of how to do a smoky eye for beginners, it's crucial to understand its fundamental components. A classic smoky eye typically involves a gradient of shades, moving from light to dark, centered around the lash line. However, the term 'smoky' is not exclusive to black and grey; it can encompass a spectrum of colors, from deep browns and plums to emerald greens and sapphire blues. The key is the smooth transition between these shades, creating a soft, diffused, and 'smoky' effect rather than harsh lines. This understanding helps demystify the process and allows for creative interpretation.
At its core, a smoky eye enhances the natural shape of your eye, drawing attention to your lashes and adding an element of mystery. It’s a versatile look that can be adapted for various occasions, from a subtle daytime smolder to a full-blown evening glam. For beginners, the initial thought might be to reach for the darkest shadow first, but a structured approach, starting with lighter transition shades, makes the process much more manageable and the outcome significantly more polished. The goal is to create an illusion of depth, making the eyes appear larger, more defined, and utterly captivating.
Beyond the color palette, the tools you use play an equally important role. A good set of brushes—specifically, a flat shader brush for packing on color, a fluffy blending brush for diffusing edges, and a pencil brush for precision work—can make all the difference. Investing in quality brushes doesn't mean breaking the bank; many affordable options perform exceptionally well. Understanding the purpose of each brush will empower you to execute each step with confidence and achieve the desired effect. Furthermore, the quality of your eyeshadows matters. Highly pigmented, blendable shadows will make your journey into mastering the smoky eye much smoother. Look for formulas that are easy to work with and don't create excessive fallout. With these foundational insights, you're not just learning to apply makeup; you're learning to understand the artistry behind one of beauty's most enduring looks. This deep dive into the 'why' behind each step will set you up for success, transforming a seemingly complex technique into an achievable and enjoyable skill. For more general makeup application tips, explore our guide on
fundamental beauty techniques.
Essential Tools and Products for Your First Smoky Eye
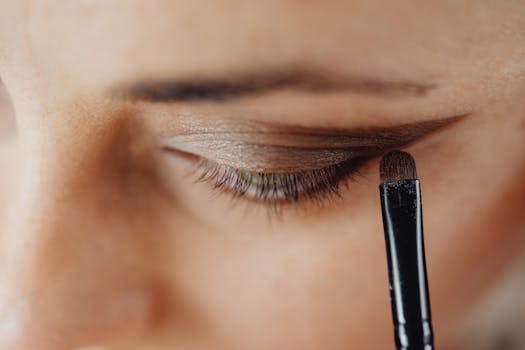 Photo: www.kaboompics.com / Pexels
Embarking on your smoky eye journey requires more than just enthusiasm; it demands the right arsenal of tools and products. For beginners, selecting the right items can be overwhelming given the vast array of choices on the market. However, a curated selection of essentials will simplify the process and ensure a successful outcome. First and foremost, an eyeshadow primer is non-negotiable. This magical product creates a smooth base, intensifies shadow color, and, most importantly, prevents creasing and smudging, ensuring your smoky eye lasts for hours. Without it, even the most expertly applied shadows can fade or migrate, especially on oily eyelids.
Next, let's talk about eyeshadows. While a classic smoky eye often features black and grey, starting with a palette that includes neutral browns, deep charcoal, and a soft highlight shade is highly recommended for beginners. A good beginner-friendly palette will typically include at least three complementary shades: a light base/highlight color, a medium transition shade, and a dark defining shade. Opt for highly pigmented shadows that are easy to blend. Matte finishes are generally easier to work with for the bulk of the smoky look, while a touch of shimmer can be added to the center of the lid or inner corner for a pop. Brands like Maybelline, NYX, and ColourPop offer excellent, affordable palettes that are perfect for experimenting.
Brushes are the unsung heroes of any eye makeup look, and the smoky eye is no exception. You'll need at least three key brushes: a flat shader brush to pack color onto the lid, a fluffy blending brush (often called a crease brush) to diffuse harsh lines and blend colors seamlessly, and a pencil brush for precise application along the lash line and inner corner. A clean, fluffy blending brush is arguably the most important tool for achieving that coveted 'smoky' effect. Remember, good brushes don't have to be expensive; many drugstore brands offer high-quality synthetic options that are easy to clean and perform beautifully.
Eyeliner is another crucial component. A kohl pencil eyeliner in black or a deep brown is ideal for beginners. It's softer and easier to smudge than liquid liner, making it perfect for creating that diffused lash line. You can apply it directly to the lash line and then smudge it out with a pencil brush or a cotton swab. Finally, a volumizing or lengthening mascara will complete your smoky eye, opening up your eyes and making your lashes pop against the dark shadow. Some prefer to curl their lashes before applying mascara for an extra lift. Having these essential items on hand will not only make the process of learning how to do a smoky eye for beginners smoother but will also elevate the quality of your final look, giving you the confidence to master this stunning technique.
Step-by-Step Guide: Mastering the Beginner-Friendly Smoky Eye
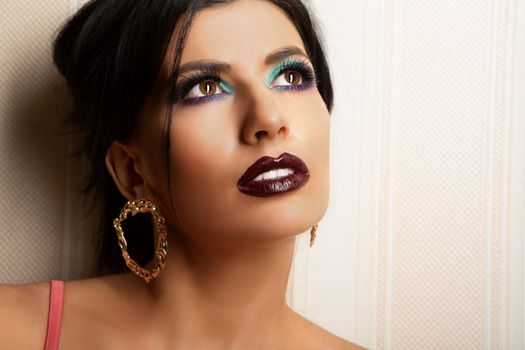 Photo: Inna Mykytas / Pexels
Now that you're equipped with the right tools and a foundational understanding, let's break down how to do a smoky eye for beginners into manageable, actionable steps. Remember, practice makes perfect, so don't be discouraged if your first attempt isn't flawless.
**Step 1: Prep Your Canvas with Primer.** Begin by applying a thin layer of eyeshadow primer across your entire eyelid, from the lash line up to your brow bone. Gently pat it in with your finger or a flat brush. Allow it to set for a few seconds. This crucial step ensures longevity, prevents creasing, and creates a uniform base for your shadows, making them appear more vibrant and blendable.
**Step 2: Lay Down Your Base/Transition Shade.** Using a fluffy blending brush, apply a neutral, medium-toned eyeshadow (a light brown, taupe, or soft grey) into your crease and slightly above it. This shade acts as your transition color, helping to diffuse the darker shades you'll apply later. Blend it in soft, circular motions, extending slightly towards the outer corner of your eye. This creates a soft wash of color that will make subsequent blending much easier.
**Step 3: Define with Your Main Smoky Shade.** Take a flat shader brush and pick up your darkest eyeshadow (black, charcoal, deep brown, or navy). Press this color onto your eyelid, starting from the lash line and working your way up to the crease. Focus the most intense pigment closest to the lash line. For a classic smoky effect, avoid going too high into the crease with this darkest shade initially. Build up the color gradually, adding small amounts until you reach your desired intensity.
**Step 4: Blend, Blend, Blend for Seamless Transition.** This is where the magic happens. Grab your clean, fluffy blending brush (or wipe off the one you used for your transition shade). In soft, windshield-wiper motions and small circles, blend the edges of your dark lid color into your transition shade. The goal is to eliminate any harsh lines and create a smooth, gradient effect. Don't be afraid to take your time with this step; it's the most critical for a polished smoky eye. If you feel like you’ve blended too much or lost some intensity, go back in with your flat shader brush and re-apply a little more of your dark shade to the lid, then blend again.
**Step 5: Define the Lower Lash Line.** Using a pencil brush and a small amount of your dark eyeshadow, gently smudge the color along your lower lash line. Start from the outer corner and work your way inwards, connecting it to the shadow on your upper lid. You can also use a kohl eyeliner pencil on your lower waterline and then smudge it with the pencil brush for an even smokier effect. This step ties the entire look together, creating balance and depth.
**Step 6: Add Inner Corner Highlight (Optional but Recommended).** For an extra pop, apply a light, shimmery eyeshadow or highlighter to the inner corner of your eyes. This brightens the eye and makes the smoky effect even more striking. You can also dab a little shimmer onto the center of your eyelid for added dimension.
**Step 7: Eyeliner and Mascara.** Complete your look with eyeliner. For a softer smoky eye, you can skip liquid liner and just use a kohl pencil along your upper lash line, smudging it slightly. For more definition, apply a thin line of liquid or gel liner. Finish with at least two generous coats of your favorite volumizing mascara. For an extra dramatic touch, consider adding false eyelashes.
Following these steps carefully will guide you through how to do a smoky eye for beginners, transforming a seemingly complex technique into an accessible and rewarding skill. Remember to clean your brushes regularly to maintain their performance and hygiene. For further learning on eye makeup, consult our guide on
enhancing eye shapes.
Common Smoky Eye Mistakes and How to Avoid Them
Mastering the smoky eye, especially for beginners, often involves a learning curve. While the previous steps provide a clear roadmap, being aware of common pitfalls can significantly accelerate your progress and lead to more satisfying results. Avoiding these mistakes is just as important as following the correct application techniques.
* **Mistake 1: Not Using Primer.** This is perhaps the most fundamental error. Without primer, eyeshadows crease, fade, and don't appear as vibrant. Your smoky eye will lose its intensity and longevity quickly.
* **Solution:** Always start with an eyeshadow primer. It’s a non-negotiable step that creates a smooth canvas and locks your shadow in place.
* **Mistake 2: Using Too Much Dark Shadow Too Soon.** Many beginners dive straight into black or the darkest shade, applying too much too quickly. This makes blending incredibly difficult and often results in a messy, rather than smoky, look.
* **Solution:** Build up dark colors gradually. Start with a small amount on your brush, tap off the excess, and apply in thin layers. It's easier to add more pigment than to take it away.
* **Mistake 3: Insufficient Blending.** Harsh lines are the antithesis of a smoky eye. If your colors look like distinct blocks rather than a smooth gradient, you haven't blended enough.
* **Solution:** Invest in a good, fluffy blending brush and dedicate ample time to this step. Use light, circular, and windshield-wiper motions. Blend the edges until there are no visible lines between shades.
* **Mistake 4: Forgetting the Lower Lash Line.** Neglecting the lower lash line can make your smoky eye look unbalanced and unfinished, as if the top half is floating.
* **Solution:** Always connect your upper and lower lash line shadow. Use a pencil brush or a small smudger brush to apply a softer version of your lid color or a deep liner along the lower lash line, smudging it gently.
* **Mistake 5: Not Tapping Off Excess Product.** Dipping your brush directly into an eyeshadow pan and applying it without tapping off excess can lead to significant fallout under your eyes, ruining your base makeup.
* **Solution:** After picking up shadow, always tap your brush gently to remove any loose pigment before applying it to your lid. You can also do your eye makeup first, then clean up any fallout, and then apply your face makeup.
* **Mistake 6: Using Only Matte or Only Shimmer Shades.** While a full matte smoky eye is chic, and a full shimmer can be dazzling, a balanced approach often yields the best results for a classic smoky look, especially for beginners.
* **Solution:** Use matte shades for the main lid and crease colors to create depth, and then strategically add a touch of shimmer to the center of the lid or inner corner for dimension and brightness.
* **Mistake 7: Choosing the Wrong Brush for the Job.** Using a large blending brush to pack on lid color, or a flat shader brush to blend the crease, will make the process much harder.
* **Solution:** Understand the purpose of each brush. Use flat, dense brushes for packing color; fluffy, tapered brushes for blending; and small, precise brushes (like pencil brushes) for detail work.
By being mindful of these common mistakes and actively implementing their solutions, beginners can significantly improve their smoky eye technique, resulting in a more polished, professional, and satisfying makeup application every time.
