✓ A smoky eye isn't just black; it can be achieved with various color palettes.
✓ Blending is the most crucial step for a seamless smoky eye look.
✓ Primer is essential for preventing creasing and prolonging wear.
✓ The intensity of your smoky eye can be customized for day or night.
How It Works
1
Prepare Your Lids
Apply an eyeshadow primer to create a smooth base and ensure your makeup lasts all day without creasing. This step is non-negotiable for a flawless finish.
2
Build Your Base
Apply a neutral base shadow across your entire lid, from lash line to brow bone. This helps subsequent colors blend more easily and evenly.
3
Define and Blend
Gradually build depth with darker shades, focusing on the outer corner and crease, then blend meticulously. Soft, circular motions are key to avoid harsh lines.
4
Finish with Flair
Add eyeliner, mascara, and optional shimmer to complete your smoky eye. These final touches elevate the look and make your eyes pop.
Understanding the Anatomy of a Perfect Smoky Eye
Photo: Alexander Krivitskiy / Pexels
The smoky eye is a timeless and universally flattering makeup look that, despite its dramatic appearance, is surprisingly achievable with the right technique and tools. Many people assume a smoky eye must be black, but this iconic style is more about the gradient and blend of colors than a specific shade. At its core, a smoky eye involves creating a soft, diffused effect around the eyes, transitioning from a darker shade near the lash line to lighter shades as you move towards the brow bone. This gradient creates depth, intensity, and an alluring gaze.
Before diving into the application, it's crucial to understand the components that make up this sophisticated look. First, you'll need a range of eyeshadow shades, typically at least three: a light base color, a medium transition shade, and a dark defining shade. While traditional smoky eyes often use black, charcoal, or deep brown, you can absolutely experiment with plums, navies, emeralds, or even warm bronzes for a softer, more modern take. The key is to select shades within the same color family or complementary tones that blend harmoniously.
Beyond eyeshadows, the right tools are paramount. A good set of makeup brushes will make all the difference. You'll need a flat shader brush for packing color onto the lid, a fluffy blending brush for diffusing harsh lines, and a smaller, more precise brush for applying shadow to the lower lash line. Don't underestimate the power of a quality eyeshadow primer; it creates a smooth canvas, intensifies pigment, and prevents creasing, ensuring your smoky eye lasts all day or night. Eyeliner, whether pencil, gel, or liquid, is essential for defining the lash line and adding to the intensity. Finally, a volumizing mascara is the finishing touch, opening up the eyes and completing the dramatic effect.
Achieving a seamless smoky eye is less about artistic talent and more about patience and practice, especially when it comes to blending. The goal is to avoid any harsh lines, allowing the colors to melt into one another. This technique, while initially intimidating, becomes second nature with repetition. Remember, makeup is an art form, and there's no single 'right' way to do a smoky eye. Feel free to adapt the techniques and colors to suit your personal style, eye shape, and the occasion. Whether you're aiming for a subtle daytime smoke or a bold evening statement, mastering the fundamentals will empower you to create stunning looks. For more general beauty tips, check out our guide on everyday beauty routines. Understanding these foundational elements is your first step towards confidently creating a captivating smoky eye.
Step-by-Step Guide: How to Do a Smoky Eye Makeup Flawlessly
Photo: Vika Glitter / Pexels
Now that you understand the essential components, let's walk through the detailed steps to create a flawless smoky eye. This guide focuses on a classic dark smoky eye, but the principles can be applied to any color palette.
**Step 1: Prep Your Eyelids.** Begin with a clean, dry eyelid. Apply an eyeshadow primer from your lash line all the way up to your brow bone. This creates a tacky base for your shadows to adhere to, prevents creasing, and enhances the vibrancy of your colors. Allow it to set for a minute.
**Step 2: Apply a Base Shade.** Using a large, fluffy brush, sweep a neutral matte eyeshadow (a shade close to your skin tone or slightly lighter) over your entire lid, from the lash line up to the brow bone. This creates a smooth canvas and helps with subsequent blending, ensuring a soft transition between colors.
**Step 3: Define the Crease with a Transition Shade.** Take a medium-toned matte eyeshadow (e.g., a warm brown or soft gray) and a fluffy blending brush. Apply this shade into your crease using soft, windshield-wiper motions. This transition shade will act as a buffer between your dark lid color and your brow bone, making the blend appear seamless. Build up the color gradually until you achieve the desired intensity.
**Step 4: Pack on the Darkest Shade.** This is where the 'smoke' truly comes in. Using a flat shader brush, apply your darkest eyeshadow (black, deep charcoal, or dark brown) directly onto your eyelid, starting from the lash line and working your way up to the crease. Pat the color on rather than sweeping to ensure maximum pigment payoff. Focus the most intense color closest to your lash line and gradually diffuse it upwards. Don't go above your crease with this darkest shade.
**Step 5: Blend, Blend, Blend!** This is the most crucial step for a professional-looking smoky eye. Take your clean fluffy blending brush (or the one you used for your transition shade) and blend out the edges of the darkest shadow. Use small, circular motions and gentle back-and-forth sweeps to soften any harsh lines between the dark lid color and the transition shade in your crease. The goal is a seamless gradient where no distinct lines are visible. Spend extra time here; patience is key.
**Step 6: Line Your Upper Lash Line.** Choose a black or dark brown eyeliner pencil, gel, or liquid. Carefully draw a line along your upper lash line, making it slightly thicker than you normally would. You can smudge this line slightly with a small brush or a Q-tip to further soften the look and integrate it with the eyeshadow.
**Step 7: Smoke Out the Lower Lash Line.** Using a small, precise brush, apply the same dark eyeshadow you used on your lid to your lower lash line. Start from the outer corner and work your way inward, stopping about two-thirds of the way. Then, take the medium transition shade and blend out the edges of the dark shadow on your lower lash line, connecting it to the outer corner of your upper lid makeup. This completes the smoky effect around the entire eye.
**Step 8: Add Inner Corner Highlight (Optional).** For an extra pop, apply a shimmery light eyeshadow or highlighter to the inner corner of your eye. This brightens the eye and makes it appear more awake.
**Step 9: Curl Lashes and Apply Mascara.** Finish the look by curling your eyelashes and applying several coats of volumizing black mascara to both your upper and lower lashes. For extra drama, consider adding false eyelashes.
**Step 10: Clean Up and Conceal.** Use a small brush with a bit of concealer to clean up any fallout under your eyes and sharpen the outer edge of your smoky eye for a crisp, lifted look. Set with a light dusting of translucent powder. With these detailed steps, you're well on your way to mastering how to do a smoky eye makeup with confidence and precision.
Choosing the Right Products and Tools for Your Smoky Eye
Photo: Beatrice Cornejo / Pexels
The success of your smoky eye isn't solely dependent on technique; the quality and type of products and tools you use play a significant role. Investing in the right arsenal can elevate your results from amateur to professional. Let's break down the essentials.
**Eyeshadow Primer:** As mentioned, this is non-negotiable. A good primer creates a smooth, even base, prevents creasing, and intensifies eyeshadow colors. Popular options include Urban Decay Eyeshadow Primer Potion, NARS Smudge Proof Eyeshadow Base, or Too Faced Shadow Insurance. Choose one that suits your skin type; some are designed for oily lids, while others offer hydration.
**Eyeshadow Palette:** While you can certainly buy individual eyeshadows, a well-curated palette makes the process much easier. Look for palettes that offer a range of shades from light to dark, including matte and sometimes shimmer finishes. For a classic smoky eye, a palette with black, charcoal, deep brown, and a few transition shades (like medium brown, taupe, or gray) is ideal. Brands like Anastasia Beverly Hills (Soft Glam or Modern Renaissance for warmer tones, Subculture for deeper greens/blues), Tarte (Tartelette in Bloom for everyday neutrals), or drugstore options like Maybelline's The Nudes or NYX Professional Makeup Ultimate Shadow Palette offer excellent variety. Consider your skin tone and eye color when selecting your palette; warmer tones often complement blue eyes, while cooler tones can make brown eyes pop. For more insights on selecting makeup, explore our guide on finding your perfect foundation match.
**Eyeliner:** The type of eyeliner you choose depends on your preference and the desired intensity. A soft kohl pencil is excellent for smudging and creating a diffused line, perfect for a classic smoky effect. Gel liners (applied with a brush) offer intense pigment and longevity, while liquid liners create sharp, precise lines for a more defined look. Brands like Marc Jacobs Highliner Gel Eye Crayon, Stila Stay All Day Liquid Eyeliner, or Inglot AMC Eyeliner Gel are highly regarded. For the lower lash line, a pencil or gel liner is often easier to work with for smudging.
**Mascara:** A volumizing and lengthening mascara is essential to complete the smoky eye. It adds drama and helps your lashes stand out against the dark eyeshadow. Look for formulas that build volume without clumping. Favorites include Benefit Roller Lash, L'Oréal Voluminous Lash Paradise, or Too Faced Better Than Sex Mascara. For an extra touch, a waterproof formula can prevent smudging throughout the day.
**Makeup Brushes:** This is where many beginners skimp, but quality brushes are an investment that pays off. You'll need:
* **Flat Shader Brush:** For packing color onto the lid with maximum intensity.
* **Fluffy Blending Brush:** The most important brush for a smoky eye. It's used to diffuse harsh lines and create a seamless gradient. Look for a soft, dome-shaped brush.
* **Pencil Brush:** A small, tapered brush perfect for precise application on the lower lash line and inner corner highlighting.
* **Angled Brush (Optional):** Useful for applying gel liner or creating a sharp wing.
Brands like Sigma, Morphe, Real Techniques, and EcoTools offer excellent quality brushes at various price points. Remember to clean your brushes regularly to prevent product buildup and bacterial growth, which can affect application and eye health. With the right products and tools, you'll find that mastering how to do a smoky eye makeup becomes a much more enjoyable and successful endeavor.
Common Smoky Eye Mistakes and How to Avoid Them
Photo: Anand Kulkarni / Pexels
Even with the best intentions and products, certain pitfalls can derail your smoky eye efforts. Recognizing and avoiding these common mistakes will significantly improve your results and ensure your smoky eye looks polished, not messy.
**1. Not Priming Your Lids:** This is perhaps the most frequent oversight. Without primer, eyeshadows can crease, fade, and lose their vibrancy quickly. The dark pigments of a smoky eye are particularly prone to creasing, which can make the look appear messy. Always apply a dedicated eyeshadow primer to create a long-lasting, smooth base.
**2. Using Too Much Product at Once:** Applying a large amount of dark eyeshadow in one go makes it incredibly difficult to blend. Instead, build up color gradually. Start with a small amount of product on your brush, tap off any excess, and apply in thin layers. You can always add more, but it's much harder to take away.
**3. Forgetting to Blend (or Not Blending Enough):** The hallmark of a beautiful smoky eye is its seamless transition of colors. Harsh lines are the enemy of a smoky look. Dedicate ample time to blending, especially at the edges of your darkest shadow and where colors meet. Use a clean, fluffy blending brush with light, circular motions. Think of it as buffing the color into submission until all edges are soft and diffused.
**4. Neglecting the Lower Lash Line:** A smoky eye isn't complete without extending the smoke to the lower lash line. Skipping this step can make your eyes look disproportionate or unfinished. Ensure you use the same dark and transition shades on your lower lash line, blending them out softly to connect with the upper lid makeup.
**5. Going Too High with Dark Shades:** While you want depth, applying your darkest shadow too high into the crease or towards the brow bone can make your eyes look smaller and create a heavy, bruised appearance. Keep the darkest shades concentrated near the lash line and gradually diffuse lighter shades upwards.
**6. Not Cleaning Up Fallout:** Dark eyeshadows are notorious for fallout, leaving specks of pigment under your eyes. This can make you look tired or create dark circles. To avoid this, apply a generous layer of translucent powder under your eyes before applying dark shadows. After applying eyeshadow, sweep away the powder and any fallout with a fluffy brush. Alternatively, do your eye makeup before your foundation and concealer.
**7. Overdoing the Rest of Your Face:** A smoky eye is a statement look. To keep your overall makeup balanced, pair it with more subdued face makeup. Opt for a neutral lip color (nude, soft pink, or sheer gloss) and a subtle blush or bronzer. Let your eyes be the star of the show.
**8. Using the Wrong Brushes:** Trying to blend with a flat shader brush or pack color with a fluffy blending brush will lead to frustration and poor results. Invest in the right brushes for each step: a flat brush for packing, a fluffy brush for blending, and a small, precise brush for the lower lash line.
By being mindful of these common errors, you can significantly improve your smoky eye technique and achieve a stunning, professional-looking result every time. Practice makes perfect, so don't be afraid to experiment and refine your approach.
Comparison
Feature
Classic Smoky Eye
Soft Brown Smoky Eye
Colored Smoky Eye
Main Color
Black/Charcoal
Warm/Cool Browns
Plum/Navy/Emerald
Intensity
High Drama
Medium/Everyday
Medium to High
Best For
Evening, Events
Day, Office, Versatile
Expressive, Trendy
Blending Focus
Seamless Dark Grad.
Soft, Natural Grad.
Color Harmony
Liner
Black, Intense
Brown, Soft
Complementary Color
What Readers Say
★★★★★
"This guide completely demystified how to do a smoky eye makeup for me! I always thought it was too complicated, but the step-by-step instructions made it so easy to follow. My eyes have never looked better."
Sarah J. · Austin, TX
★★★★★
"As a beginner, I found this article incredibly helpful. The tips on blending and product selection were spot on. I finally achieved a smoky eye that didn't look like a raccoon!"
Michael B. · New York, NY
★★★★★
"I used to struggle with creasing and fallout whenever I tried a smoky eye. Following the primer and cleanup tips from this guide, my makeup now lasts all night without a single smudge. Truly a game-changer for how to do a smoky eye makeup."
Jessica L. · Los Angeles, CA
★★★★★
"The guide is fantastic, especially the blending advice. I still need a bit more practice to get it perfect, but I've seen a huge improvement. Maybe a few more examples of different color palettes would be nice, but overall excellent."
Emily R. · Chicago, IL
★★★★★
"My wife used this guide to create a smoky eye for our anniversary dinner, and she looked absolutely stunning. The subtle brown smoky eye option was perfect for a romantic evening. Highly recommend this resource for anyone wanting to learn how to do a smoky eye makeup."
David K. · Miami, FL
Frequently Asked Questions
What is the easiest way to do a smoky eye for beginners?
For beginners, start with a soft brown or gray smoky eye instead of black. Use only two or three shades (a light base, a medium transition, and a dark defining color). Focus heavily on blending the edges with a clean, fluffy brush, and don't be afraid to start with less product and build up gradually.
My smoky eye always looks messy. How can I avoid this?
Messiness often comes from insufficient blending or too much product applied at once. Ensure you're using an eyeshadow primer, building color gradually in thin layers, and dedicating significant time to blending out all harsh lines with a clean, fluffy brush. Also, clean up any fallout under your eyes with concealer or by sweeping away baking powder.
How do I make my smoky eye last all day without creasing?
The key to long-lasting, crease-free smoky eye makeup is proper preparation. Always start with an eyeshadow primer to create a smooth, tacky base. Using good quality, long-wearing eyeshadows and setting your under-eye area with a light powder after cleanup can also help extend wear.
Are expensive eyeshadows necessary for a good smoky eye?
While high-end eyeshadows often offer superior pigmentation and blendability, you don't necessarily need expensive products to achieve a good smoky eye. Many drugstore brands now offer excellent quality eyeshadows and palettes. Focus more on technique, proper blending, and using a good primer, which can make even more affordable shadows perform well.
What's the difference between a smoky eye and a cut crease?
A smoky eye is characterized by a soft, diffused gradient of color, where shades blend seamlessly without harsh lines, creating a 'smoked out' effect around the eye. A cut crease, on the other hand, involves a sharp, defined line that separates the lid color from the crease color, creating a distinct contrast and often making the lid appear larger. They are distinct techniques with different aesthetic goals.
Who should use how to do a smoky eye makeup?
Anyone can wear a smoky eye! It's a versatile look that can be adapted for all eye shapes, skin tones, and occasions. The intensity and color palette can be customized from a subtle, everyday smoke to a dramatic evening look. It's particularly popular for those wanting to add depth and allure to their eyes.
Can a smoky eye look be too much for daytime?
Not necessarily! While the classic black smoky eye is often reserved for evening, you can absolutely create a 'daytime smoky eye' by opting for softer shades like browns, grays, or even muted plums. Focus on a lighter application, less intense liner, and thorough blending for a more subtle, office-appropriate smoke.
What are the upcoming trends for smoky eye makeup?
Future trends for smoky eye makeup are leaning towards softer, more diffused edges, incorporating unexpected color palettes (like pastels or jewel tones), and experimenting with different textures (glossy lids, glitter accents). The 'reverse smoky eye' (focusing the smoke on the lower lash line) and monochromatic smoky eyes are also gaining popularity, offering fresh takes on the classic.
Ready to transform your look and captivate with your eyes? Use this comprehensive guide on how to do a smoky eye makeup to master the art. Practice these steps, experiment with colors, and unleash your inner makeup artist today!

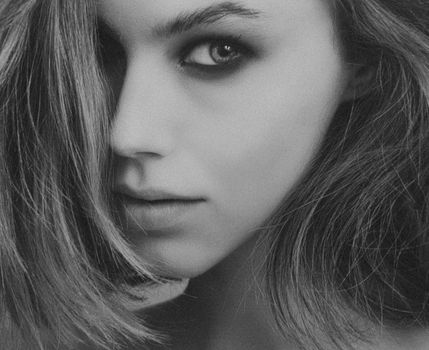 Photo: Alexander Krivitskiy / Pexels
 Photo: Vika Glitter / Pexels
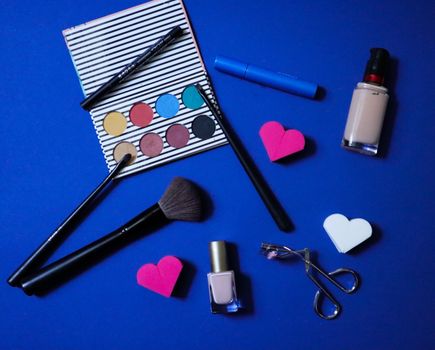 Photo: Beatrice Cornejo / Pexels
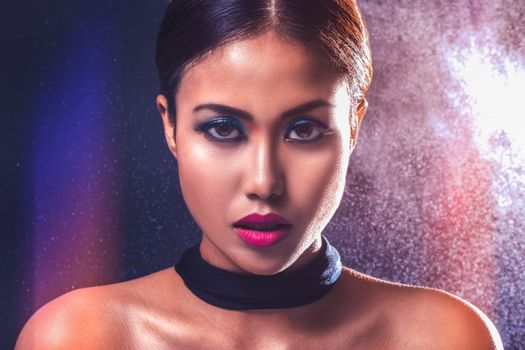 Photo: Anand Kulkarni / Pexels